Getting started
Account registration
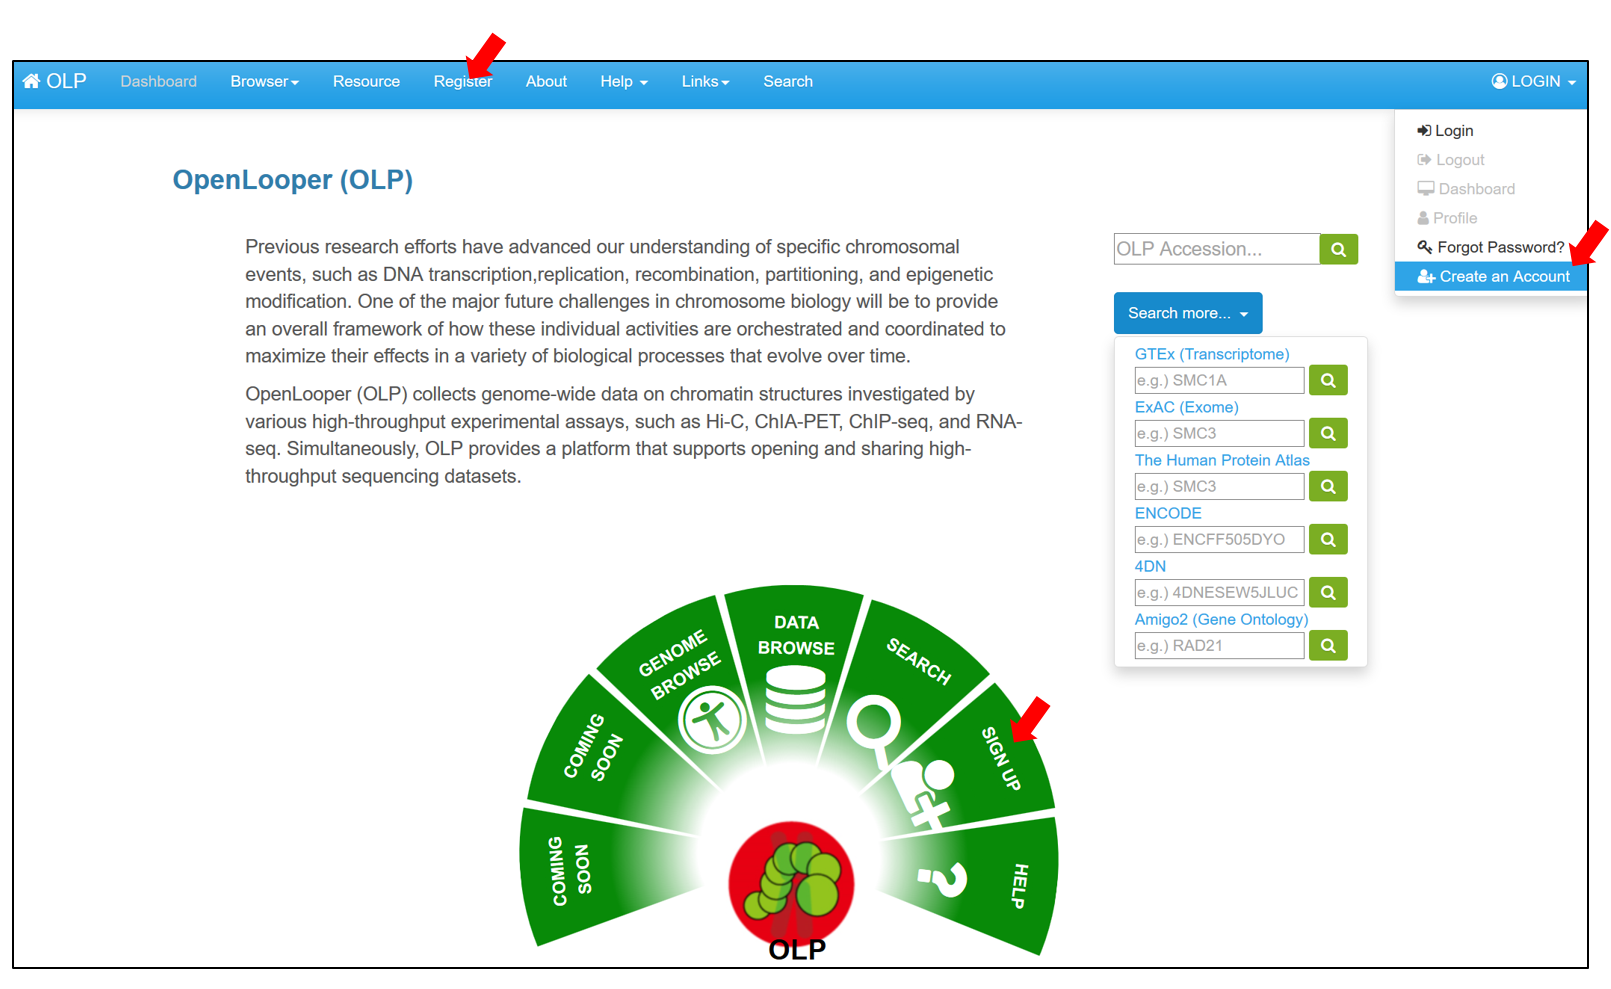
To enjoy all the functions of OLP, users should create an account through the Registration website . Note that users must be care about e-mail address. The e-mail address is used as the account name, and OLP sends information to that address.
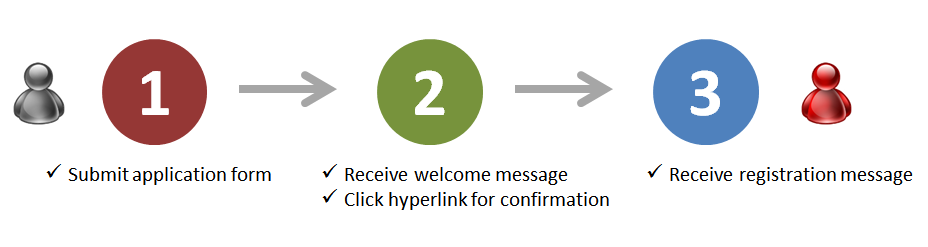
Once a user submitted the application form (STEP1), OLP contacts the user via an e-mail for its confirmation. The user must respond within 12 hours (STEP2). OLP sends another e-mail after response occurred, which includes the detailed account information (STEP3).
A user signed up can modify the account profile through the Profile website presenting at the active Dashboard. In addition, by filling an e-mail address, users can find/reset the login password. We recommend you to first do login when playing with OLP, because OLP records that have (been) shared with co-workers and been in private mode appear only after logging in.
File upload

After signed up, Dashboard activates a website for uploading files into OLP. By using the function of "drag and drop" or directory explorer (i.e."Browse" button), users can add/delete multiple files (<6 files). Each of the files is uniquely recorded as an OLP record.
4.5G / file is the filesize limitation. Acceptable file formats in the File Uploader (not File Attachment) are as follows;
By running external programs that are available at here for example, one can convert some of file formats unacceptable in OLP.
Annotation
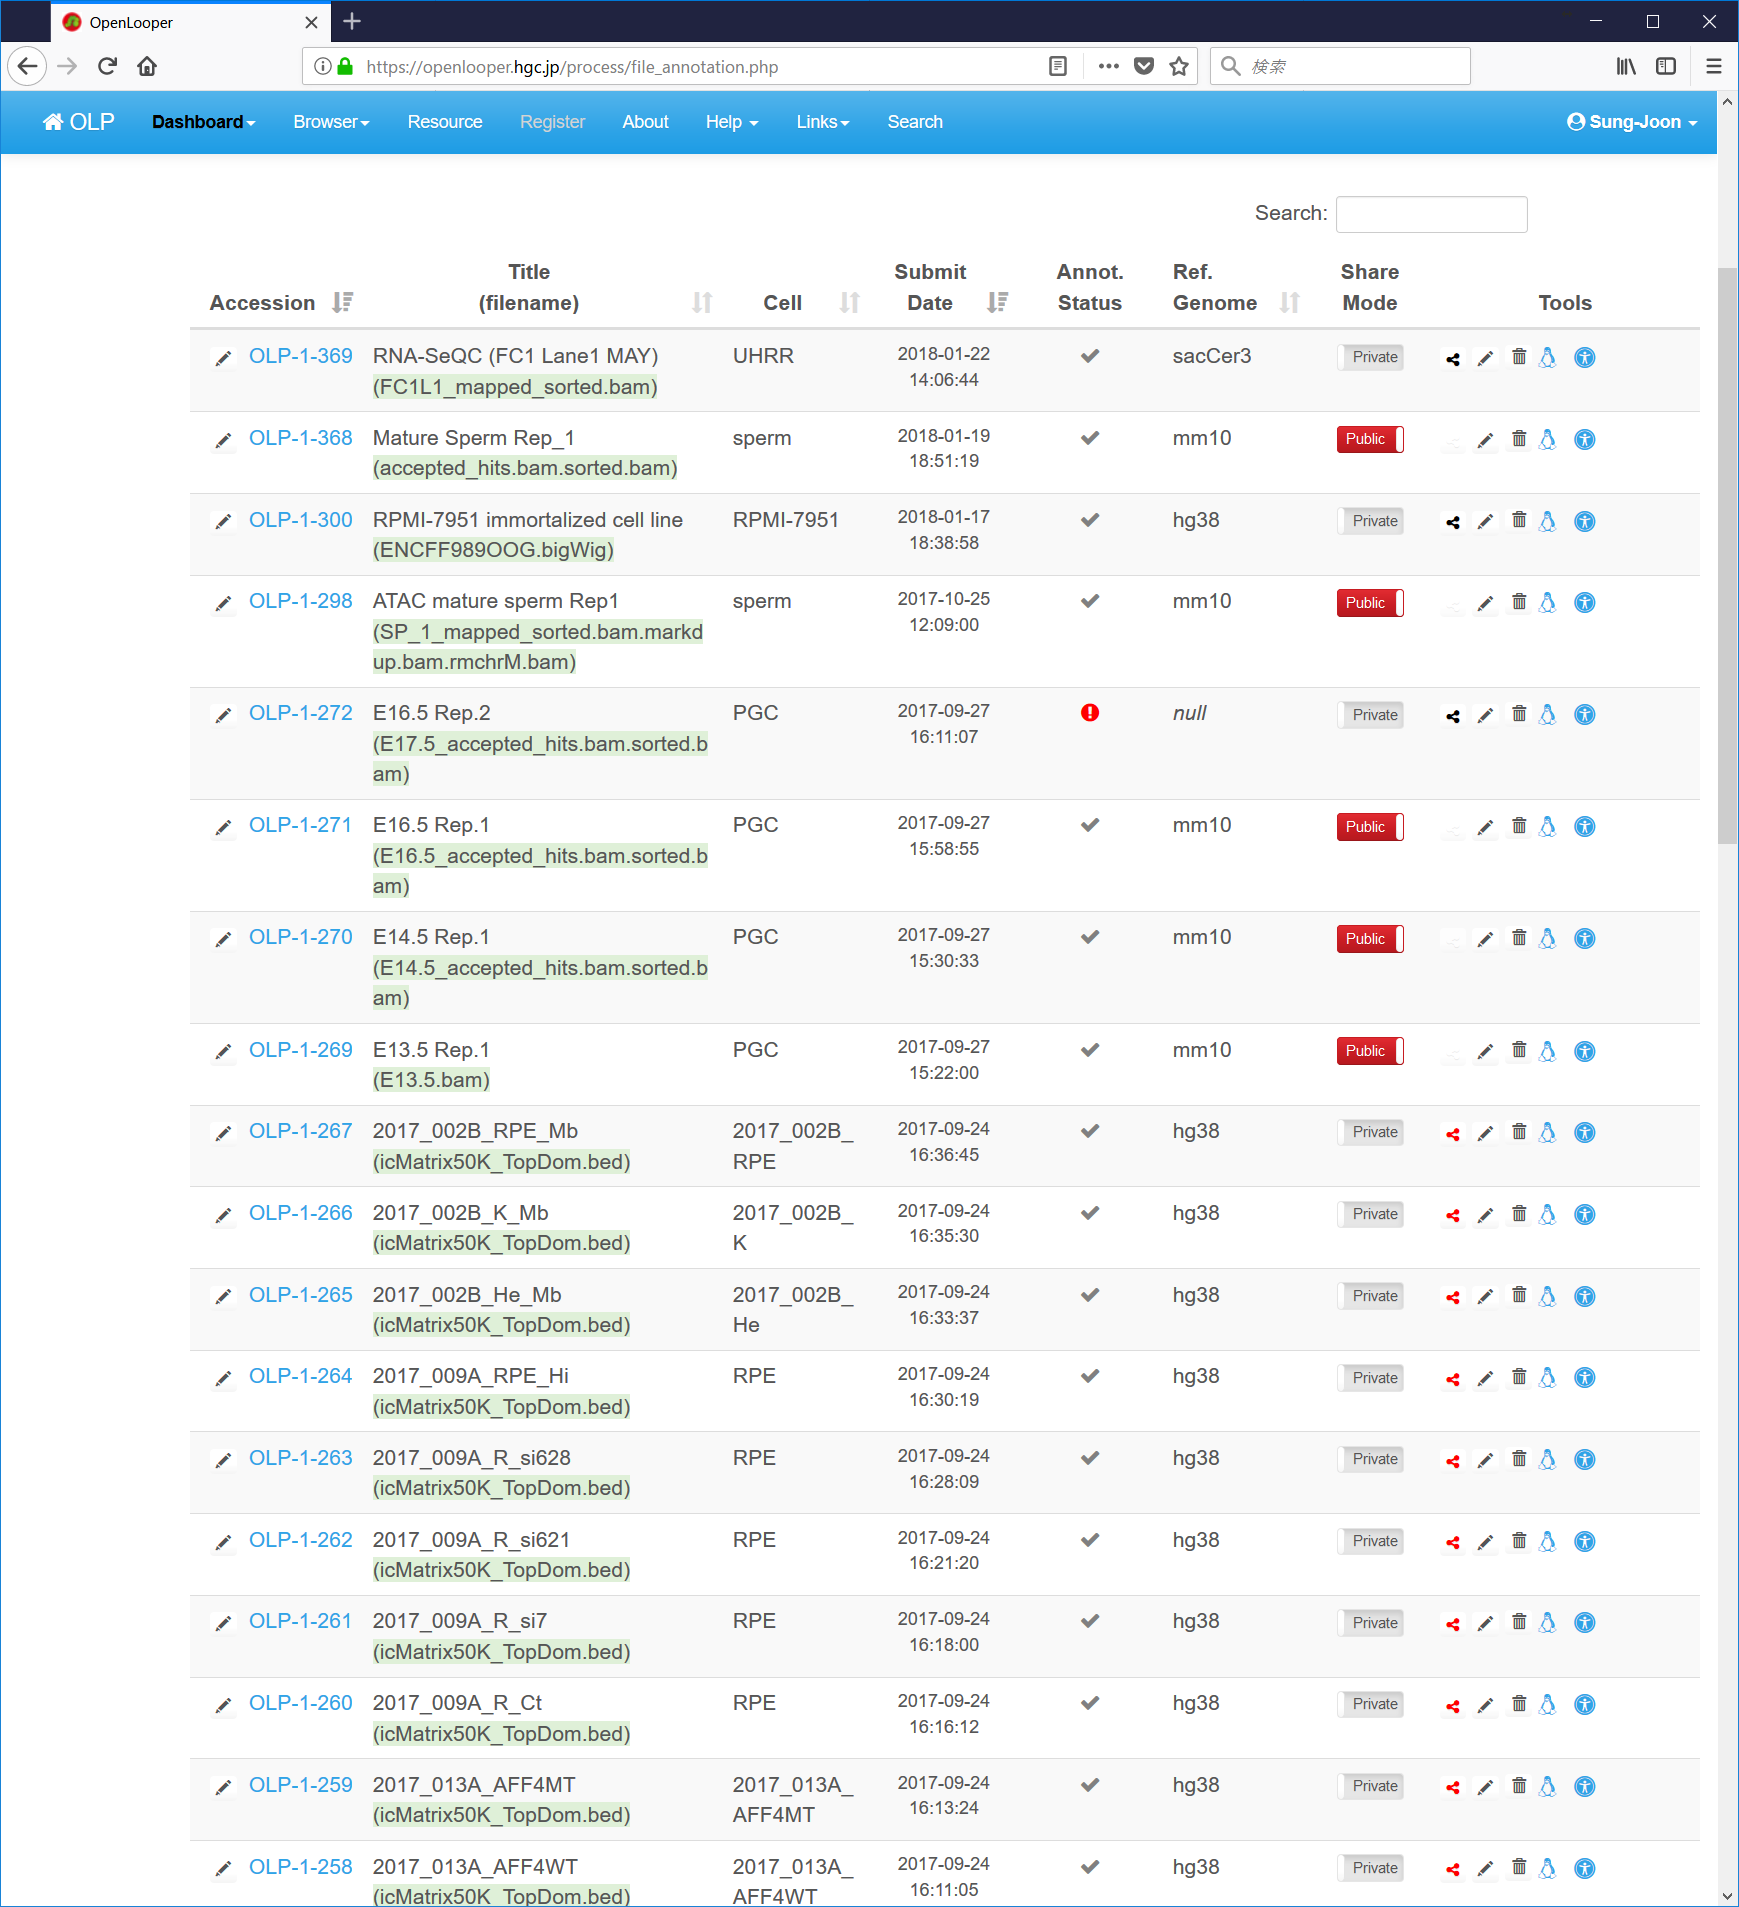
Every uploaded file must be annotated. Records that have not been completely annotated are not appeared in OLP, excluding the Annotation website. The Annotation website lists up OLP records that the login user uploaded.
Icon description:
-
Link to edit page
Completed (all required items were filled)
Incomplete annotation
Unshared
Shared with other users
Deletion
Working log
No browsable in JBrowse
Browsable
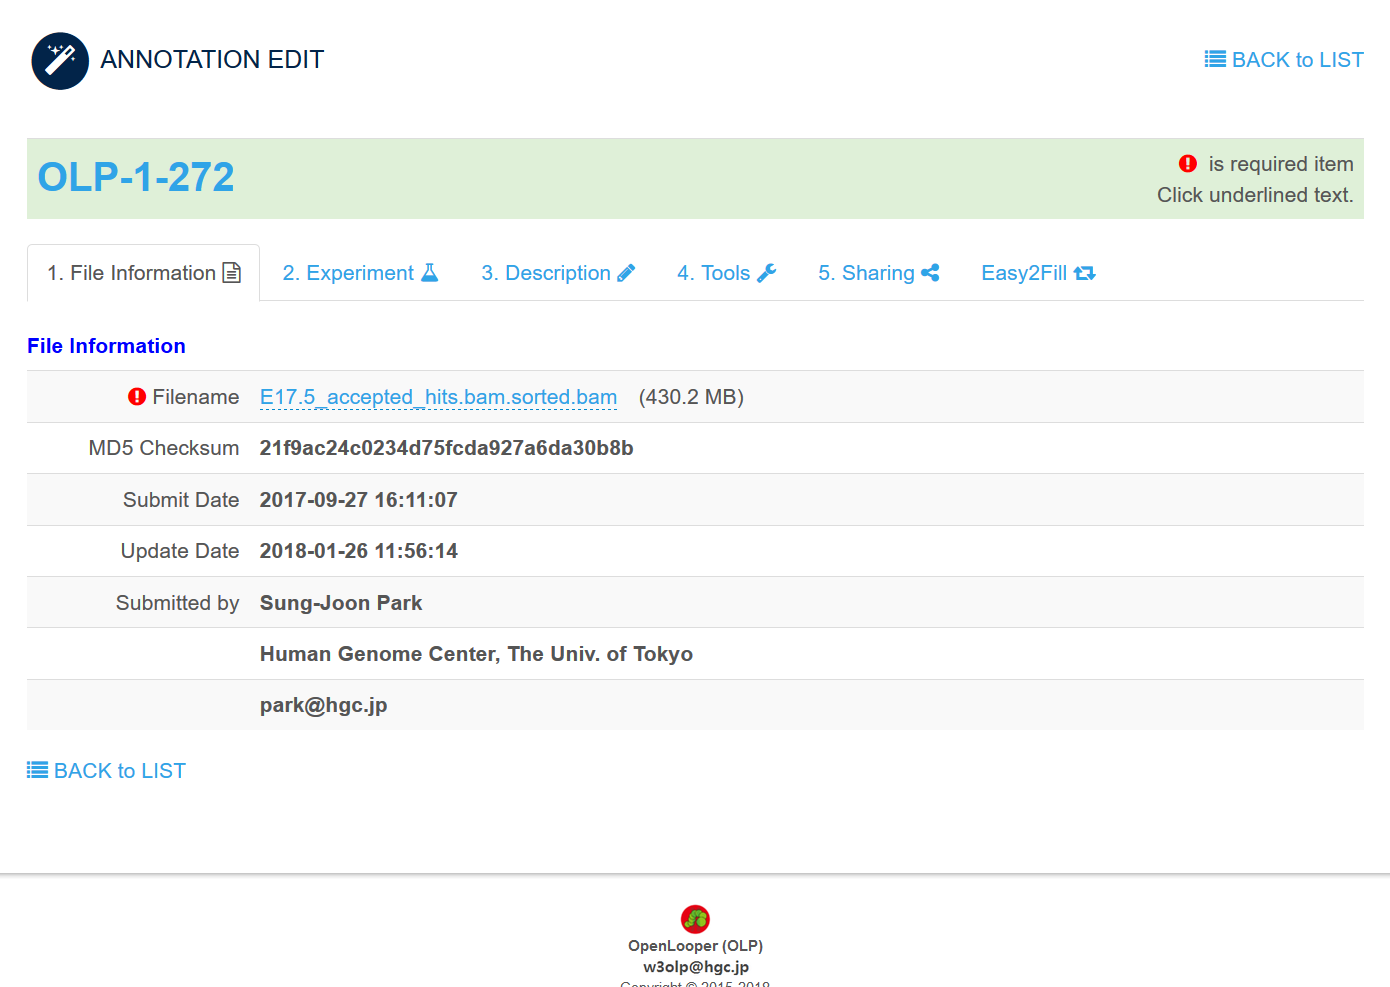
The edit page consists of five Tabs;
- "1. File Information"
- nothing to fill up
- "2. Experiment"
- fill up all required items to clarify experiment setting
- "3. Description"
- describe the purpose of this study, methods for processing, etc.
- "4. Tools"
- configure the OLP record for properly working with JBrowse
- "5. Sharing"
- setting this either Public or Private mode. Controlling the user sharing
If you have at least one private data, OLP requests to enter login account & password via HTTP basic authentication pop-up window. This is for handling your private data.
File attachment and Zoomable images
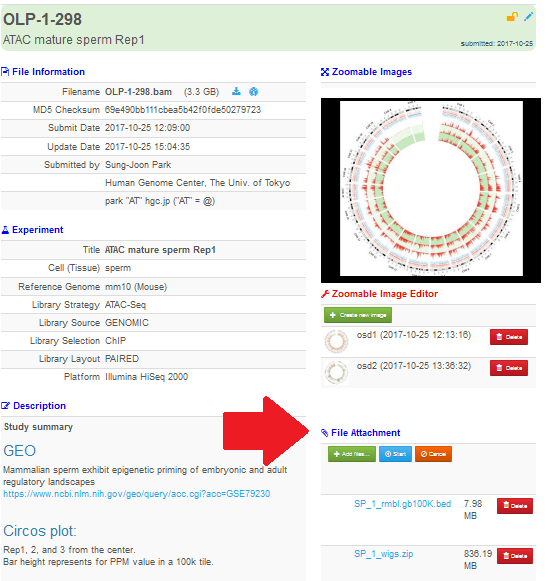
OLP record viewer (e.g. https://openlooper.hgc.jp/file_view.php?acc=OLP-1-298) shows attached files in the right bottom panel of the viewer. Only the owner who deposited an OLP record can attach files to the record after login to OLP. By clicking the button "Add files...", the owner can select and upload multiple files at once.
— OpenLooper (@w3olp)
If PNG/PDF/TIFF/JP(e)G files exist, the owner can create zoomable images by using the Zoomable Image Editor. This function has been implemented just like in OpenTein (Nucl. Acids Res. 44(D1):D1000-D1004, 2016). The image viewer provides smooth full-screen zoom in/out visualization, and we recommend uploading high-resolution images to utilize this viewer.
Genome browser
— OpenLooper (@w3olp) 2018年1月30日
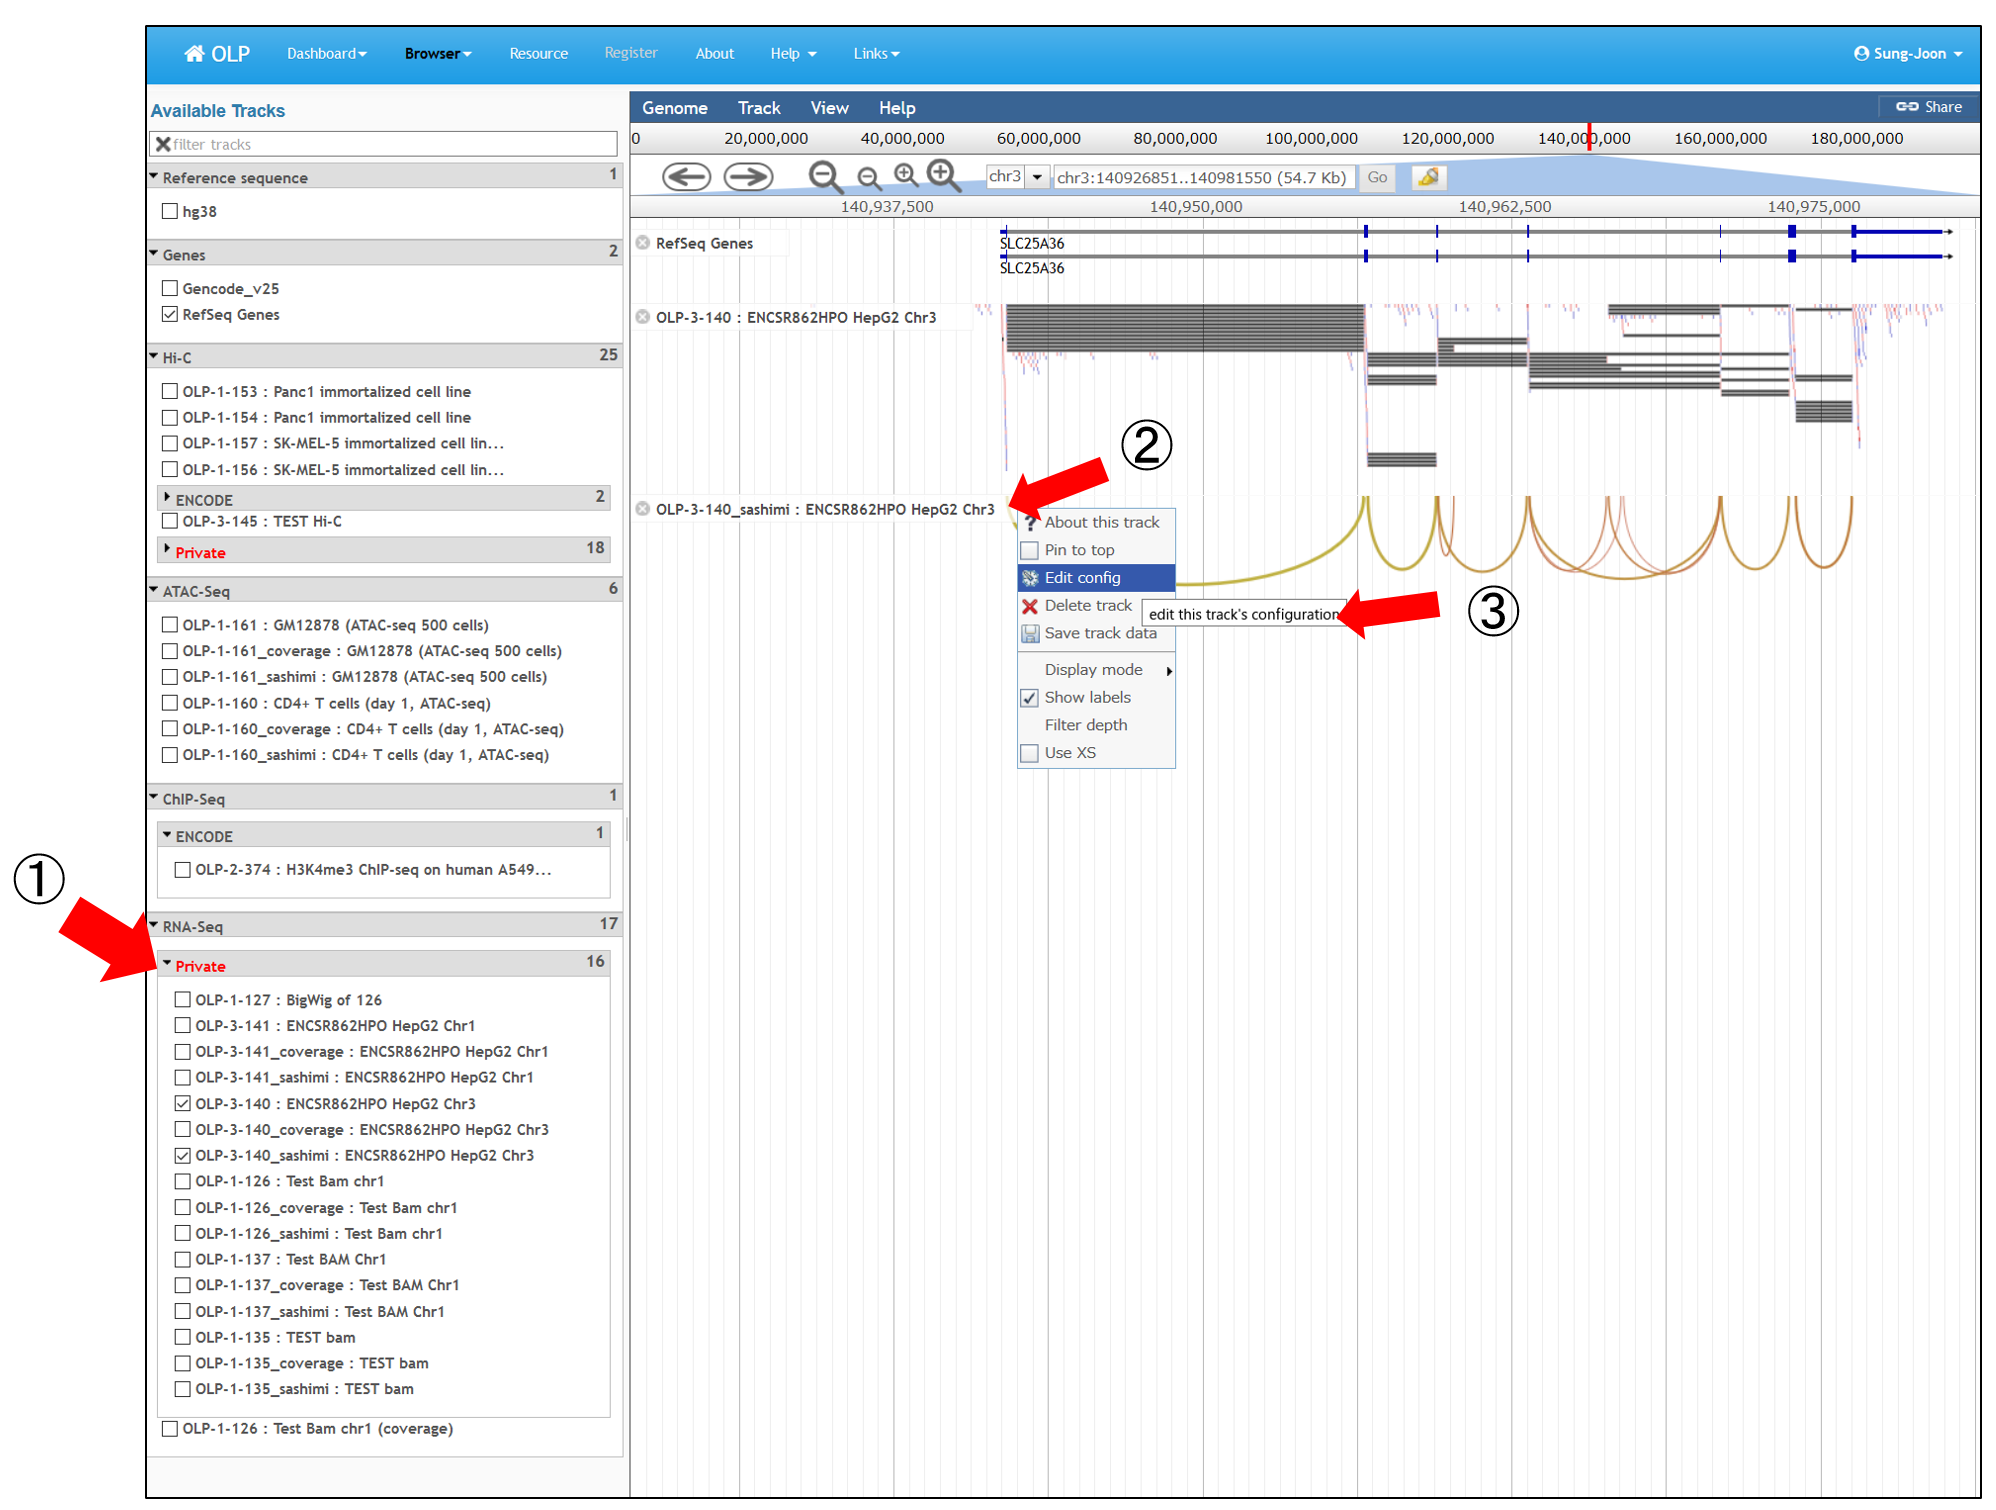
The OLP genome browser uses JBrowse, which is a ultra-fast javascript-based genome browser . Once the configuration of a OLP record in "4.Tools" at the edit page succeeded, JBrowse serves a track for the OLP record. The browser will request to enter OLP login account & password via HTTP basic authentication pop-up window if you have private or shared records. The browser shows a track selector in the left-side panel (1 in the above figure), which lists up all records that you uploaded and shared by other users.
Note that if BAM was uploaded, OLP automatically creates Coverage and Sashimi tracks that are more affordable for browsing;
- For example, OLP-1-269
- OLP-1-269 (default BAM track)
- OLP-1-269_coverage track
- OLP-1-269_sashimi track
- All tracks of OLP-1-269
How to change colors/line width/height etc. is;
in the right-side panel, the browser shows a track name bar (2 in the Fig.). The right-mouse-button click on this track name bar presents a selector menu (3 in the Fig.). Among the items, "Edit config" provides a window to modify the current track configuration.
For example, OLP-1-153 track shows TADs in Sashimi plot with default color. If you modify the code as follows via "Edit config", the line color will change to red;
  "style": {
    "_defaultHistScale": 4,
    "_defaultLabelScale": 30,
    "_defaultDescriptionScale": 120,
    "showLabels": true,
    "showTooltips": true,
    "label": "name,id",
    "description": "note, description"
    ,"color": "red"
  },
In some tracks for "coverage" or "BigWig", "Edit config" may include
"pos_color": "#FFA600",. If you change it to
"pos_color": "red",and click "Apply", the histogram bg-color for positive values will be changed into Red.
If you need to modify the score gauge for a track to a certain height, add the term "max_score: value" via "Edit config";
"max_score": 100,
"category": "ATAC-Seq /Public",
"label": "OLP-1-520",
Please see the manual to learn more about the configuration.

 Log out (
)
Log out (
)